Schweißen

Video

acArc puls process for aluminium welding | Titan XQ 400 AC puls | EWM

With the AC welding process (acArc) of the new Titan XQ 400 AC puls (EWM), MIG aluminium welding becomes even easier in both manual and automated sectors. Clean weld seams without residues of smoke on thin sheets, even with AlMg alloys, are possible with MIG-AC. With the acArc puls XQ proccess, the polarity switches between positive (pulse) and negative in the process, with the heat shifting from the material to the welding consumable. As such, air gaps are effectively bridged and welding fume emissions reduced. Advantages: - Perfect aluminium welding, even with thin sheets - Very good ignition characteristics - Excellent gap bridging, even with automated applications - Minimised heat input - Higher welding speed - Simple and safe handling of the arc for manual and automated welding - Well suited for additive welding with aluminium (3D welding) - Clean weld seams due to heavily reduced magnesium oxide - Lower welding fume emissions - Fast digital current regulation with EWM RCC technology (Rapid Current Control) __ __ __ __ __ __ __ __ __ __ __ __ __ __ __ More information: Titan XQ 400 AC puls: https://www.ewm-sales.com/en/MIG_MAG_welding_machines/Titan_XQ_puls/Titan_XQ_AC_puls_D__decompact_--220152.html PM 551 W RD3 X Alu: https://www.ewm-sales.com/en/Welding_torches/MIG_MAG/Water_cooled_____PM_series/Function_torch/PM_551_W/PM_551_W_RD3_X_Alu_M9_3_m_O_1_0_mm--094-700005-40600.html __ __ __ __ __ __ __ __ __ __ __ __ __ __ __ Follow EWM AG: Facebook: https://de-de.facebook.com/ewmhightec... Instagram: https://www.instagram.com/ewm_welding/ __ __ __ __ __ __ __ __ __ __ __ __ __ __ __

EWM

Video

SpotArc - Heftfunktion beim WIG-Schweißen | EWM

Mit der Funktion spotArc von EWM kann man Heftpunkte setzen auf Stahl- und Edelstahlblechen von 1-4 mm. Die spotArc-Funktion ist in allen Geräten der Tetrix-Serie enthalten. EWM Tetrix DC: https://www.ewm-sales.com/de/WIG_Schweissgeraete/Tetrix_DC--14174.html spotArc Brenner: https://www.ewm-sales.com/de/Schweissbrenner/WIG/Punktschweissbrenner/SPOTARC_TIG_18_W_5P_4m--094-500048-00000.html?variantId=10258 https://www.ewm-sales.com/de/Schweissbrenner/WIG/Punktschweissbrenner/SPOTARC_TIG_26_G_5P_4m--094-500046-00000.html?variantId=10206 Kupferdüsen spotArc-Brenner: https://www.ewm-sales.com/de/Schweissbrenner/Verschleissteile/WIG/spotArc_Verschleissteile/GN_CWT--094-009602-00002.html?variantId=9728 Einstelllehre: https://www.ewm-sales.com/de/Schweissbrenner/Verschleissteile/WIG/spotArc_Verschleissteile/AG_SPOTARC--094-014146-00001.html?variantId=9732 _______________________________ With the EWM spotArc function, you can set tack points on steel and stainless steel plates of 1–4 mm. The spotArc function is included in all machines of the Tetrix series. EWM Tetrix DC: https://www.ewm-sales.com/en/TIG_welding_machines/Tetrix_DC--14174.html spotArc TIG torch: https://www.ewm-sales.com/en/Welding_torches/TIG/Spot_welding_torch/SPOTARC_TIG_18_W_5P_4m--094-500048-00000.html https://www.ewm-sales.com/en/Welding_torches/TIG/Spot_welding_torch/SPOTARC_TIG_26_G_5P_4m--094-500046-00000.html Copper nozzles for spot welding: https://www.ewm-sales.com/en/Welding_torches/Consumables/TIG/spotArc_consumables/GN_CWT--094-009602-00002.html Setting gauge: https://www.ewm-sales.com/en/Welding_torches/Consumables/TIG/spotArc_consumables/AG_SPOTARC--094-014146-00001.html __ __ __ __ __ __ __ __ __ __ __ __ __ __ __ __ __ __ Follow EWM AG: Facebook: https://de-de.facebook.com/ewmhightecwelding/ Instagram: https://www.instagram.com/ewm_welding/ __ __ __ __ __ __ __ __ __ __ __ __ __ __ __ __ __ __

EWM

Video

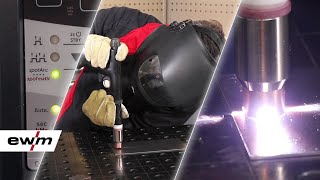
How to Set Up Your xFume™ Advanced Fume Extraction Unit

In this video we will show you step-by-step how to set up your xFume Advanced fume extraction unit, so that you can start welding! Related Videos: xFume™ Advanced - How to Change Carbon Brushes on 230V Motor: https://youtu.be/67Hlu-UBHsg For more welding knowledge visit our blog: https://blog.binzel-abicor.com Visit our Website: www.binzel-abicor.com ********** If you purchased the 230 volt version of the xFume Advanced, before you can use the unit, you must first wire the plug for 230 volts. The 115 volt version of the xFume Advanced comes with the plug installed. Remove the contents of the dust tray, which include a filter wrench, air fitting adapter, and a three eighth inch industrial quick disconnect air fitting. Install the air fitting adapter and snug tight with an adjustable wrench or a three quarter inch wrench. Install the three eighth inch industrial quick disconnect. Be sure to use thread tape to ensure a proper seal. Snug tight with an adjustable or 11 sixteenths inch wrench. Ensure that the air supply is cleaned and dried. Connect your airline to the fitting. To maintain proper flow, the supply air pressure must be between 70 and 90 PSI. Setting up the torch and welding machine is the same as if you were welding without fume extraction. Do this now. Connect the provided extraction hose to the torch and the unit. Plug the unit into either a 230 volt or 115 volt socket, depending on the unit you purchased. When not using the auto start, stop function, set the switch to manual and use the power switch to power the unit on and off. To use the auto start, stop function, set the switch to auto and keep the power switch set to on as shown here. Connect the current sensing shunt around either the welding torch cable or ground cable. Use the air flow control dial on the front of the unit to adjust vacuum speed up or down as needed. The xFume Advanced features automatic filter cleaning. Cleaning pulses occur between welds when using the auto start, stop function. When not using the auto start, stop function, the unit will pulse at startup and if necessary during shutdown. The service light will activate when filter cleaning is necessary. If the service light is still on after the cleaning cycles, verify your compressed air supply is secure and replace filters if necessary. Before working with your fume extraction setup, we recommend you perform some test welds to ensure proper fume extraction is taking place.

Abicor Binzel

Video

How to Change the Filters in Your xFume™ Advanced Fume Extraction Unit

In this video we show you step-by-step how to change the filters in your xFume Advanced fume extraction unit. For more welding knowledge visit our blog: https://blog.binzel-abicor.com Visit our Website: www.binzel-abicor.com ********** Before changing the filter on your X-Fume advanced unit, make sure to turn the power off, unplug the unit from the wall socket, and secure the locking caster wheels. Be sure to wear gloves and eye protection during this process. Dust masks are also recommended, as fine particles of hazardous material may become dislodged from the filter during removal and handling. Remove the dust tray from the unit base and dispose of the contents properly, then replace the dust tray. Unlock the two horizontal quick release latches that secure the motor box to the sound-dampened exhaust stack. Release the two latches that secure the filter box to the unit base. The filter box can then be placed on the floor or workbench with the intake ports facing upwards. Using the supplied filter wrench, loosen the filter and remove it from the housing. Bag and dispose of the filter properly. Thread the new filter on by hand until you feel resistance; then, snug the filter using the filter wrench to ensure a proper gasket seal. Repeat these steps for the second filter. Carefully center the filter box back onto the base and securely quick release latches. Be sure to test your fume extraction unit to ensure it is functioning properly before working with it full time.

Abicor Binzel

Filtern

Suchbegriff

Unterkategorie

Firmen

Inhaltstyp

Firmentyp

Land